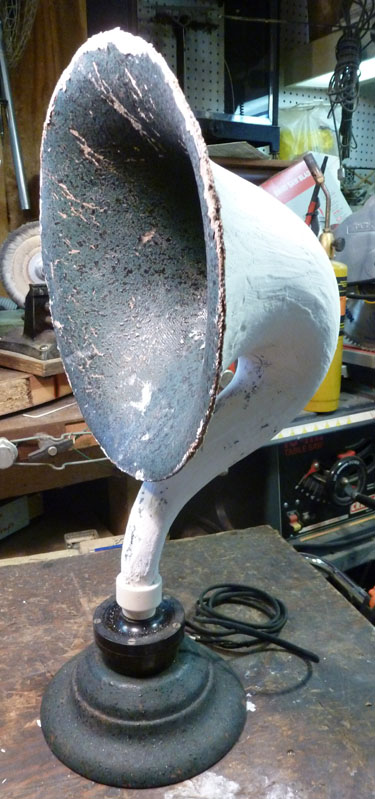
I rescued this horn when it was headed for the trash.
Our group was sorting through the collection of one of our members who had passed away and his family had asked us to sell his collection at our upcoming
antique radio conference.
We spent many hours packing up his radios and parts and test equipment from his work shop.
One of the guys was in the attic of his shop handing down items to be packed up. When he handed down this horn he said just to toss this in the trash because it was in such bad shape it wouldn't be worth the trouble to sell.
Well I really like horn speakers and I also like the challenge of repairing something that appears unrepairable...
So instead of putting it in the trash I took it home.
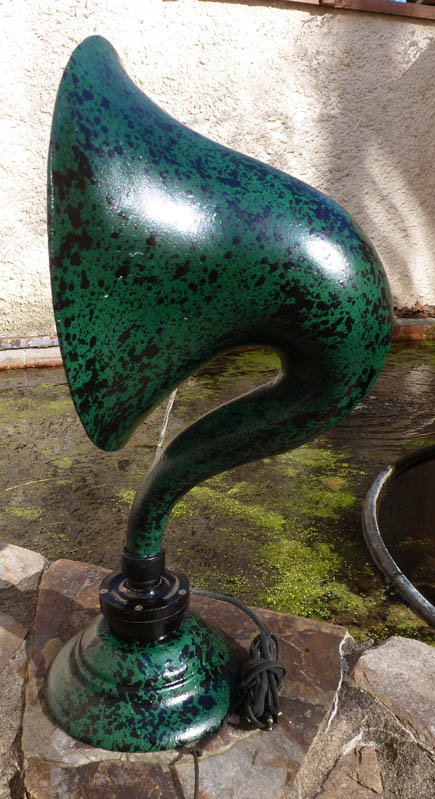
The horn part of the speaker is made of paper mache
and so much of the outside surface was missing it was soft to the point of being mushy.
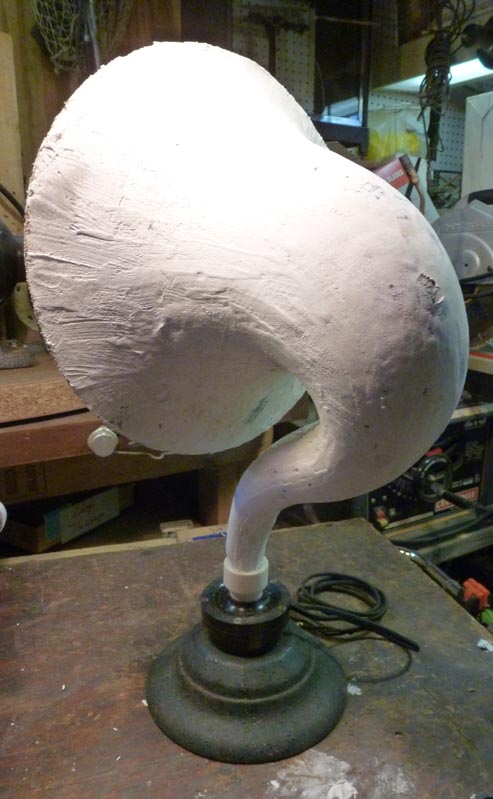
I started off using sandpaper to remove the remainder of the loose stuff on the outside and then started applying coats of spackling compound and then sanding them smooth. it took many coats to get the surface filled in and smooth.
fortunately the inside of the horn still had it's painted surface intact so I could see what it had originally looked like.
It was kinda unusual with it's green base color and black speckling.
Once the surface was smooth and the winter weather subsided some and the temptress warmed up enough to allow me to spray paint I started off using primer and sprayed several coats, them I sprayed it satin black because the black paint would show surface imperfections more. This required me to apply several more coats of spackling compound.adding more black paint inbetween.
When I was satisfied it was smooth enough I applied several coats of Hunter Green satin paint.
All this time I had been thinking about and asking other old radio guys for suggestions as to how to get the black speckled paint finish.
One of the suggestions was to use an atomizer to spray the paint thinking it would cause to paint to splatter.
Another suggestion and the one I finally ended up using was to drill out the nozzle of a paint spray can to a larger size. I started out drilling the nozzle out with a very small bit, working my way up in size until I finally hit one that made a satisfactory size of splatter.
I tested the spray several times until I got the hang of spraying the splattering paint.
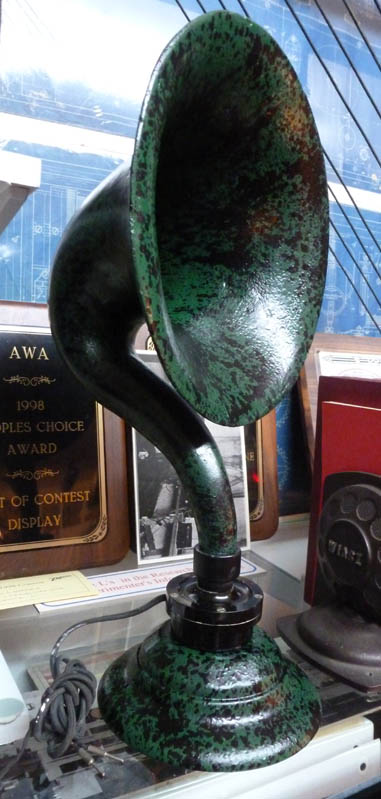
Below are photos of the finished paint job.
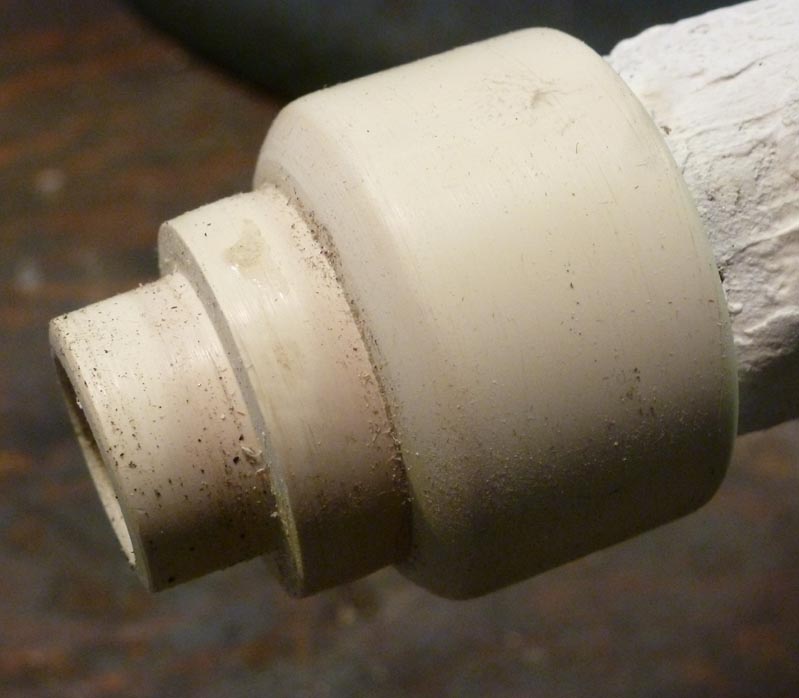
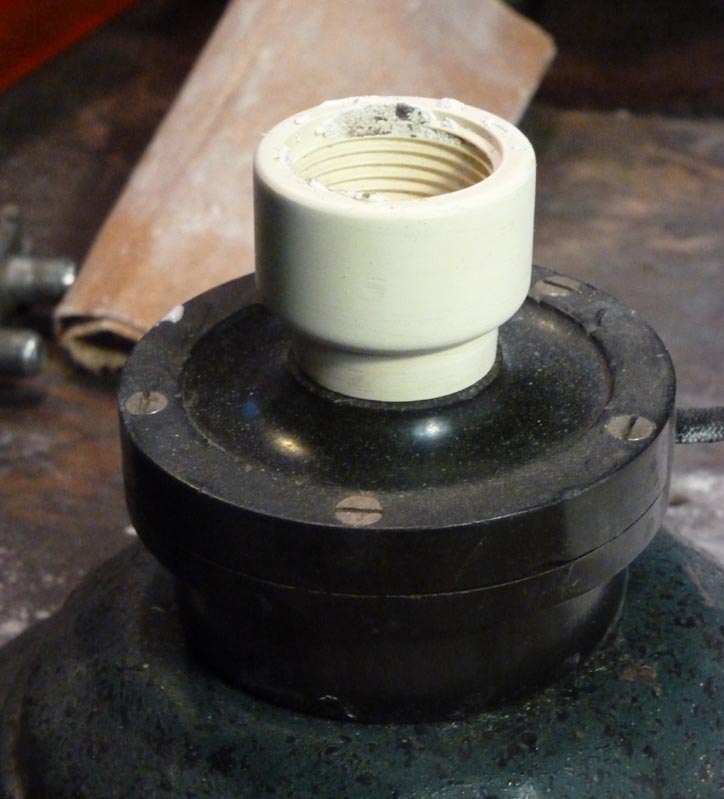
Another problem with the horn was that the feral that fitted to bottom of the paper mache horn to the driver was missing.
I searched the plumbing dept. at Home Depot looking at PVC fittings, I bought several that I thought were about the right size. I used my drill press and some rubber mandrills that came with my drum sanding kit to hold the PVC fittings and cut and filed and sanded 2 of them until I had made 2 pieces that would fit together and fit the bottom of the horn and to opening in the top of the driver.
I painted this satin black and then buffed it to give it a little shin so it matched the bakelite driver.
I'm pretty please with the results.
I really like the challenge of repairing something that
had been deamed to be trash and not repairable.